2024年9月23日星期一

Retrieving Secret Values Using REST Services in Infisical

Infisical

Infisical is the open source secret management platform that developers use to centralize their application configuration and secrets like API keys.

What Attracts Me Most: The Ability to Self-Host and a Community Edition That Fully Meets Personal Needs

This article simply introductions how to configure and obtain new credentials.

Generate ClientId and ClientSecret

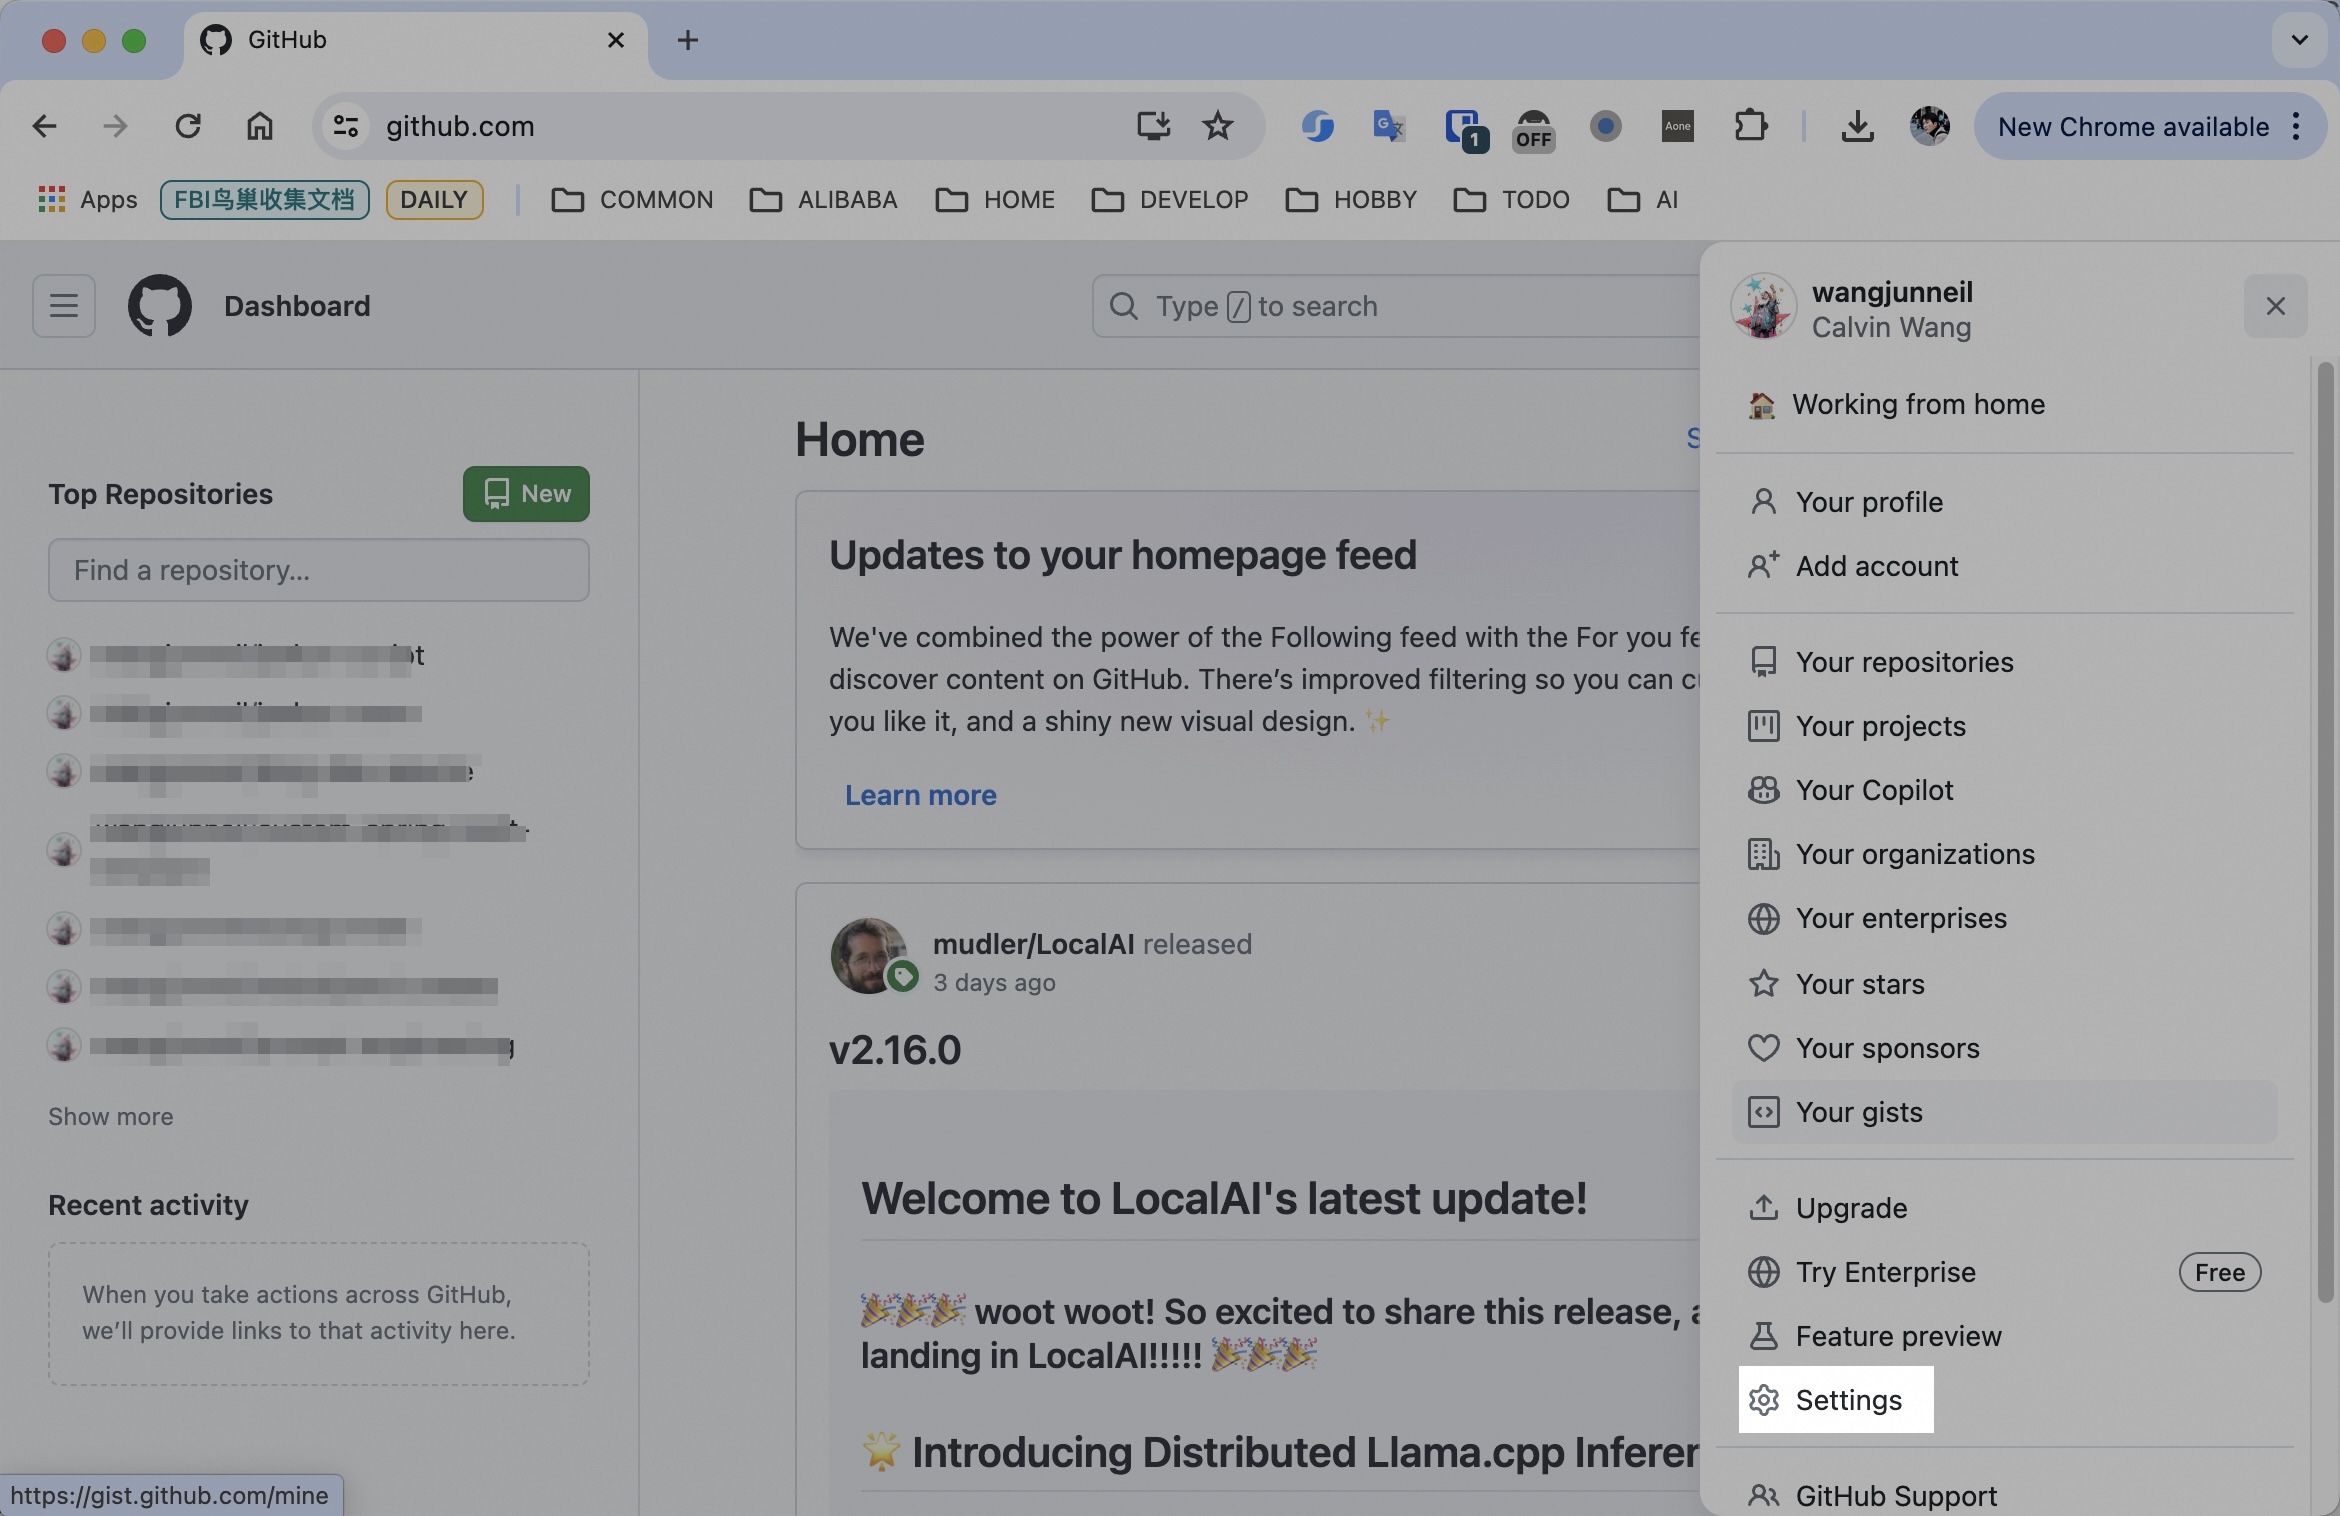
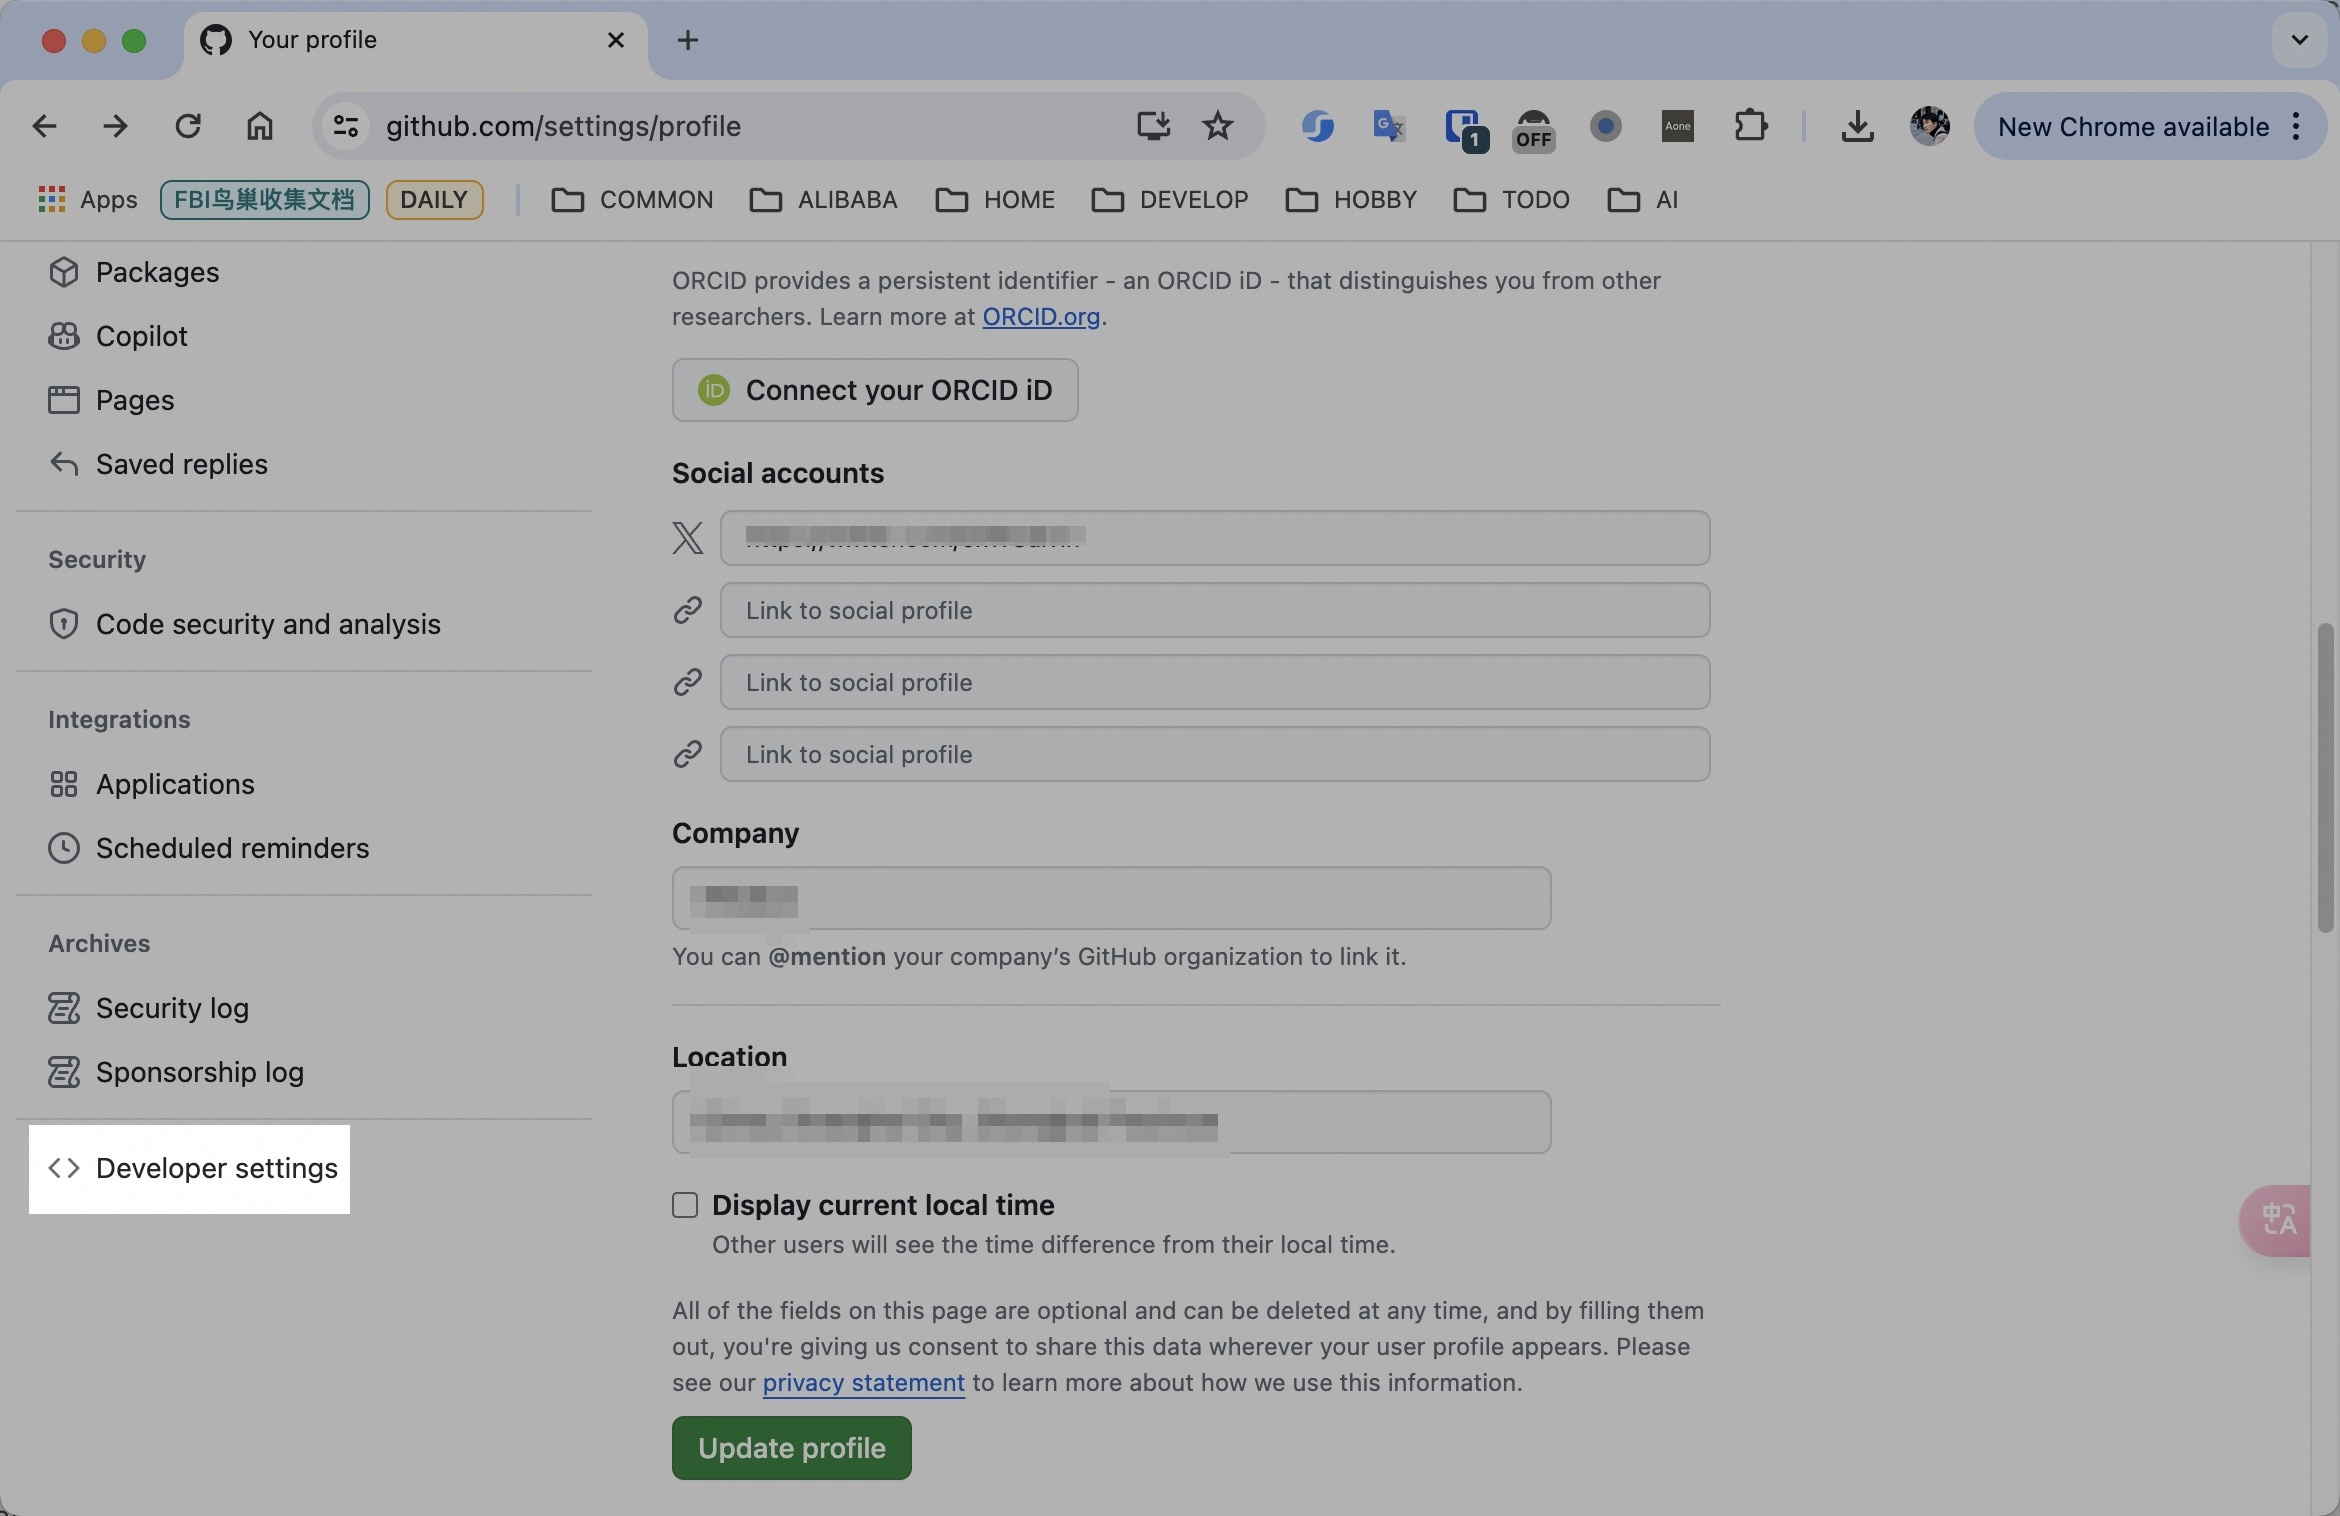
Go to your Infisical dashboard page, and you will see the "Access Control" menu on left panel.

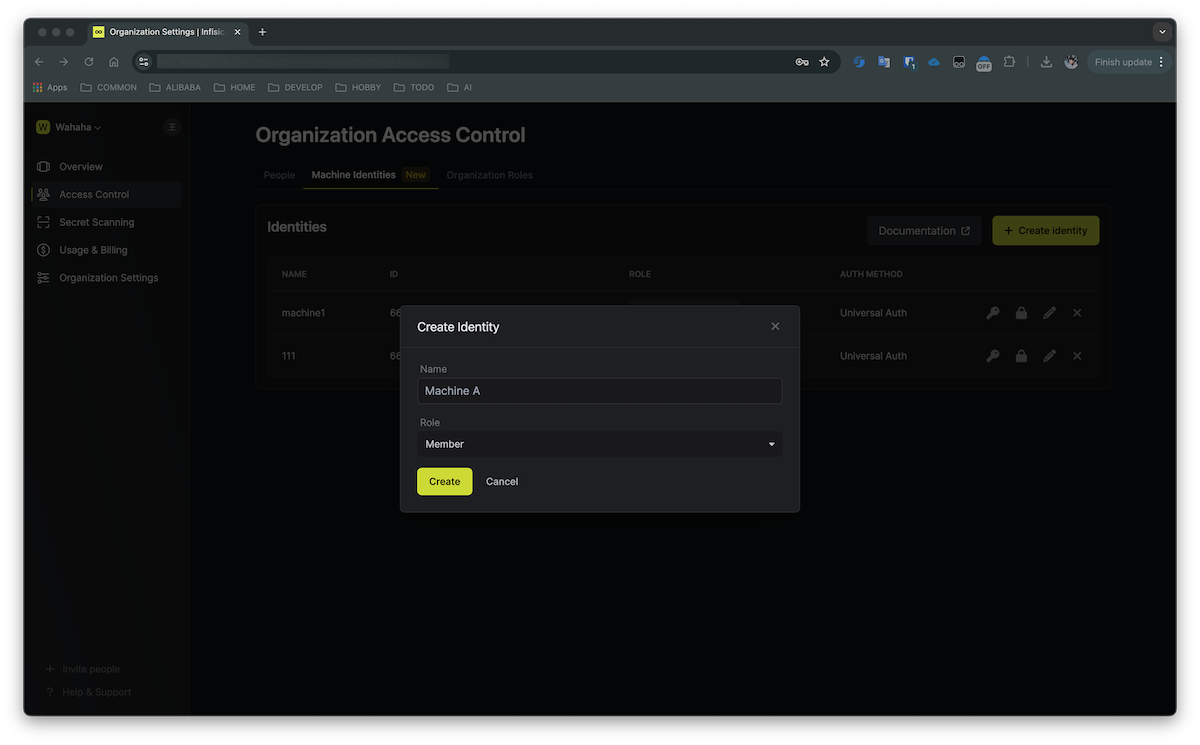
Click in sequence: "Access Control" -> "Machine identities" -> "Create Identify",enter the "Name" and select the "Role", Finally, click the "Create" button to enter the configuration page.

Infisical_dashboard
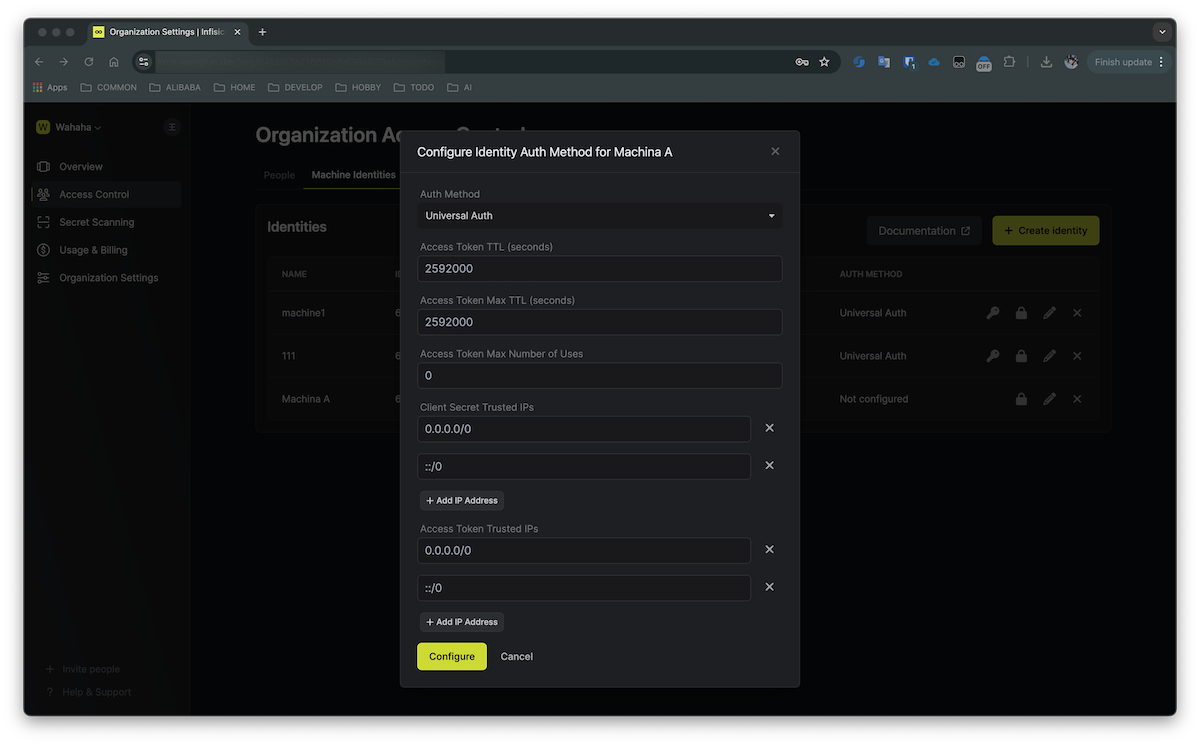
The configuration page you can confiure token expire time, or trust Ips

On the confiuration page, you can confiure the token expiration time or the trusted IPs.
You can also keep all setting at their default, click the "Configure" button.

machine_configure

Return to the Machine Identities list page, click the key icon button on the right, and you will see the Client ID, then, click the "Create" button to generate the Client Secret.

machine_clientsecret
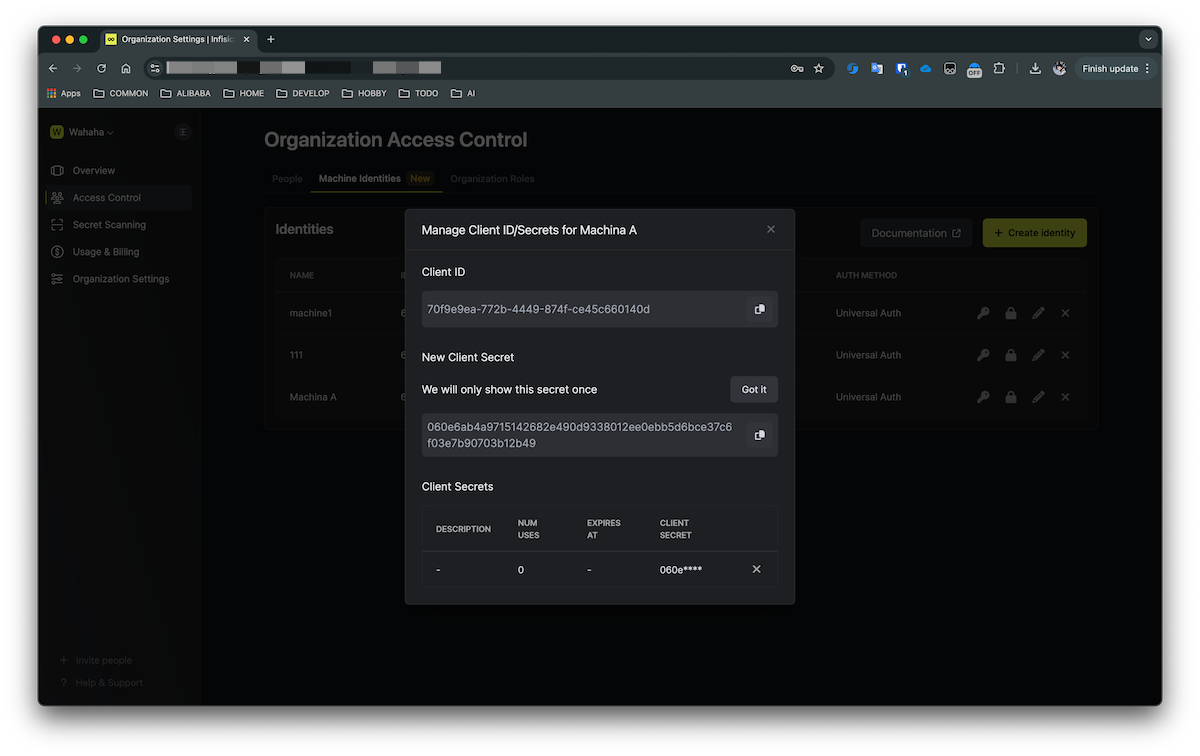
Finally, Copy the Client ID and Client Secret to secure location. Be careful, the Client Secret will only be displayed once, if you lose it,you will have to regenerate it.

Attach the Machine Identities to The Project

Return to the Infisical dashboard page, and click the "Add new Project" button to create a test project.

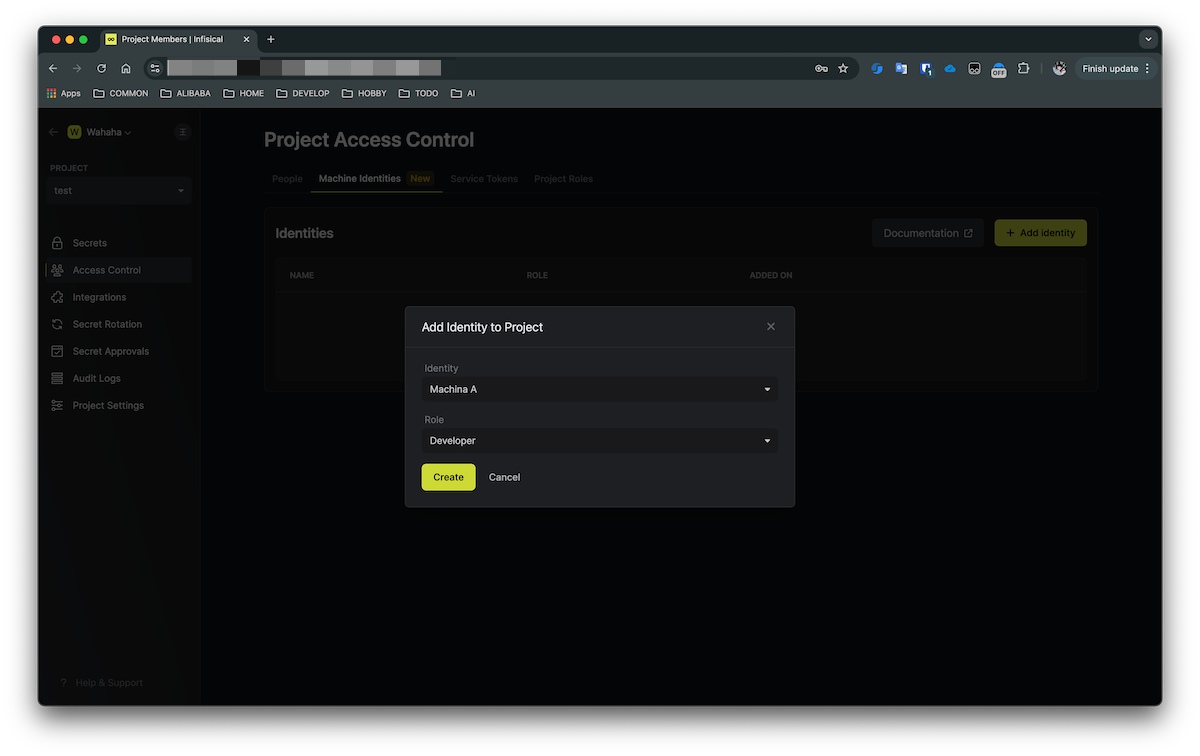
Click the "Explorer" button to enter the "test project", click in sequence, "Access Control" -> "Machine Identities" -> "Add identity", Select the machine identities you previously created, and choose the role "Developer", finally to the "Create" button.

machine_attach

Obtain accessToken using ClientId and ClientSecret

Now we have the ClientID and the ClientSecret, the next step is to request an accessToken from the Infisical server using them.

$ curl --request POST \
  --url https://<your infisical host>/api/v1/auth/universal-auth/login \
  --header 'Content-Type: application/json' \
  --data '{
  "clientId": "<Client ID>",
  "clientSecret": "<Client Secret>"
}'
{
  "accessToken": "eyJhbGciOiJ...........w8KsMTs",
  "expiresIn": 2592000,
  "accessTokenMaxTTL": 2592000,
  "tokenType": "Bearer"
}

Retrieving Secret Value Using AccessToken

# workspaceId, you can find it in the browser's URL
# secretKey, the secret key
# environment, dev or prod, maybe more
# secretPath, the secret directory
$ curl --request GET \
  --url https://<your infisical host>/api/v3/secrets/raw/<secretKey>?workspaceId=66f10299543f9f3255dfba57&environment=dev \
  --header 'Authorization: Bearer <your access token>'
{
  "secret": {
    "_id": "66f11438543f9f3255dfc08f",
    "version": 1,
    "workspace": "66f10299543f9f3255dfba57",
    "type": "shared",
    "environment": "dev",
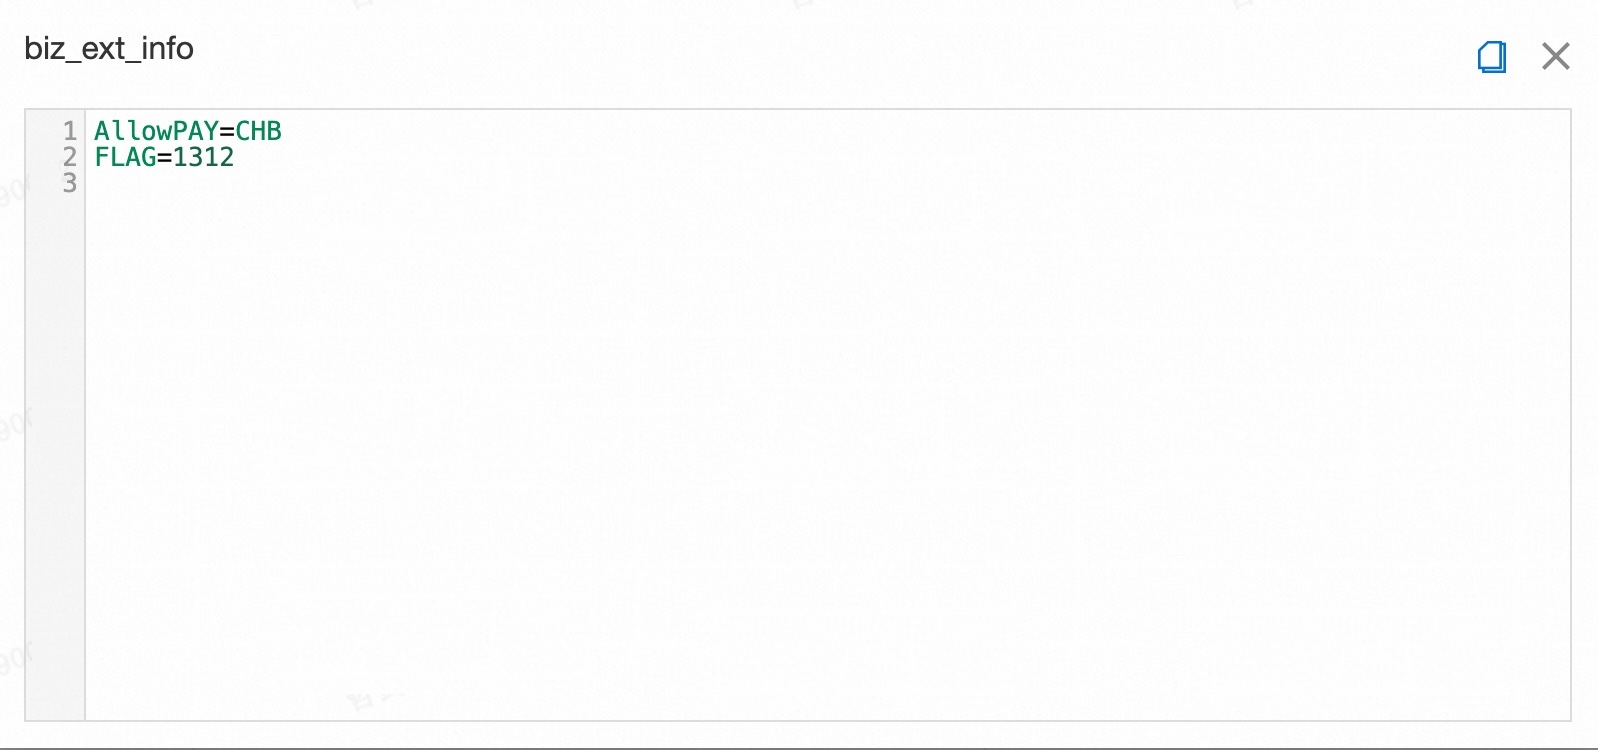
    "secretKey": "MY_PASSWORD",
    "secretValue": "123321",
    "secretComment": ""
  }
}

Conclusion

REST services are more universal, as they can be implemented in any language, and of course, different SDKs can be used according to one's enviroment. In summary, this is a process of authentication to obtain the secret value, which is sufficient to meet my normal needs.

For more details, please refer to the "Reference" section.

Reference

2024年7月29日星期一

一种 Key-Value 的数据表扩展字段 bizExtInfo 的存取方式

1. 背景

当在数据库中设计表结构时,通常会预留个 扩展字段(biz_ext_info),防止后续因需求变化导致模型频繁变更的问题,这个 扩展字段(biz_ext_info) 通常会设置较大的可变字符串,如下:

CREATE TABLE `xxxxxx` (
  ...
  ...
  `biz_ext_info` varchar(2000) DEFAULT NULL COMMENT '扩展信息',
) ENGINE=InnoDB DEFAULT CHARSET=utf8mb4 COMMENT='xxxxxx'
;

大部分人的做法会存储 JSON 字符串,存取时都会有个 JSON 解析的过程,同时数据显示也并不直观,下面是通过一种方式让 扩展字段(biz_ext_info) 里存储的数据以一种 Key-Value 的方式存储。

biz_ext_info

如上图所示,当查看 bizExtInfo 时,就类似于表字段+值的方式,相对于 JSON字符串 在查看或者读取使用时将会方便很多。

2. 实现

主要通过两个方法实现:

  • public static String map2string(Map<String, String> map)
  • public static Map<String, String> string2map(String str)

2.1. 存储

在保存数据库对象,这里以 Record 举例,使用 map2string 方法,将 map 转成 string 存储到数据库中

Map<String, String> map = Maps.newHashMap();
map.put("FLAG", "1312");
map.put("AllowPAY", "CHB");
record.setBizExtInfo(MapUtil.map2string(map));

2.2. 读取

从数据库中读取出来,使用 string2map 转成 map,由于 Record 对象里 bizExtInfo 属性定义的是字符串类型,通常会在 Record 类扩展一个方法,如 fetchBizExtInfo(String key)

public class Record {
    ......
    ......
    private String bizExtInfo;

    public String fetchBizExtInfo(String key) {
        Map<String, String> bizExtInfoMap = MapUtil.string2map(bizExtInfo);
        return bizExtInfoMap.get(key);
    }
}

3. 源码

2024年5月27日星期一

Google Github Gitlab SSO 配置获取

SingleSignOn

单点登录(Single Sign-On, SSO) 是一种用户认证过程,它允许用户使用一个单一的身份凭证(如用户名和密码)来访问多个独立的软件系统。SSO 通过集中管理用户身份和认证过程,提高了用户体验和系统安全性,减少了用户记住多个密码的负担。

本片文章将介绍常用的单点登录平台的配置

Githb

登陆进入Github个人首页,点击右上角 个人图标,选择 Settings 菜单,进入设置页面

sso_github_1

选择最下面的 Developer settings 开发者设置菜单

sso_github_2

选择左侧 OAuth Apps 菜单,点击右侧 New OAuth App 新建一个 OAuth 应用

sso_github_3

输入 Application name,和 Homepage URL 主页地址,Authorization callback URL 授权的回调地址,正常回调地址的路径根据自己的应用决定,这里的 /api/v1/sso/github 只是一个例子,最后点击 Register application 注册应用

sso_github_4

注册完成后会跳转到 OAuth app 的详情页面,点击 Generate a new client secret 生成一个客户端密钥,此时已经完整的获取了 CLient IDClient secrets

sso_github_5

Google

进入 Google Cloud 控制台页面,在上面搜索框搜索 Credentials 关键字,选择 Credentials

sso_google_1

点击 创建凭据 - OAuth 客户端 ID,跳转到下一页面

sso_google_2

应用类型选择 Web应用,输入 名称,在 已获授权的重定向URI 中填入你的回调授权地址,如我的 https://www.example.com/api/v1/sso/google,最后点击 创建 按钮

sso_google_3

创建完成后,跳转到下一页会弹出 Client ID 和 Client Secrets

sso_google_4

Gitlab

进入 Gitlab 首页,点击左侧头像,选择 Edit profile 菜单

sso_gitlab_1

将页面拉到最下面,点击左侧 Applications 菜单,进入应用列表页面,点击右侧 Add new application 创建一个新应用

sso_gitlab_2

输入应用的名称 Name,重定向地址 Redirect URI,在 Scopes 里选中 read_user,最后点击 Save application 创建应用

sso_gitlab_3

创建完成后,在下一个页面就可以看到生成的 Client ID (Application ID)Client Secret (Secret)

sso_gitlab_4

2024年5月6日星期一

AI故障排除:Failed to initialize NVML: Driver/library version mismatch

nvidia-gpu

故障描述

在使用 GPU 开发和训练AI程序时,可能会遇到这样的问题,nvidia-smi 命令识别 GPU 昨天好好的,今天就突然出错了

$ nvidia-smi
Failed to initialize NVML: Driver/library version mismatch

这个问题的原因是 NVIDIA 驱动库的版本与系统内核模块不一致。要修复这个问题,需先删除当前的 nvidia 驱动程序,并重新安装正确的 NVIDIA 驱动程序版本就可以解决。

修复步骤

检查内核版本

检查显卡驱动程序使用的内核版本

$ cat /proc/driver/nvidia/version
NVRM version: NVIDIA UNIX x86_64 Kernel Module  535.171.04  Tue Mar 19 20:30:00 UTC 2024
GCC version:  gcc version 11.2.0 (Ubuntu 11.2.0-19ubuntu1)

NVRM版本内核模块为 535.171.04,系统内核为22.04

删除 NVIDIA 驱动

运行以下命令,删除包括 nvidia-common 在内的所有 NVIDIA 软件包。

$ sudo apt purge nvidia-* 
$ sudo apt purge libnvidia-*

执行完毕后,在使用以下命令检查是否还有遗留

$ dpkg -l | grep -i nvidia

查找可用的驱动版本

使用Ubuntu自带的驱动管理工具 ubuntu-drivers devices 来查询当前版本Ubuntu推荐的驱动。

$ ubuntu-drivers devices
== /sys/devices/pci0000:00/0000:00:09.0 ==
modalias : pci:v000010DEd00001EB8sv000010DEsd000012A2bc03sc02i00
vendor   : NVIDIA Corporation
model    : TU104GL [Tesla T4]
driver   : nvidia-driver-418-server - distro non-free
driver   : nvidia-driver-470 - distro non-free
driver   : nvidia-driver-470-server - distro non-free
driver   : nvidia-driver-535 - distro non-free recommended
driver   : nvidia-driver-545 - distro non-free
driver   : nvidia-driver-535-server - distro non-free
driver   : nvidia-driver-450-server - distro non-free
driver   : xserver-xorg-video-nouveau - distro free builtin

输出结果如上,一行中出现了“recommended”二字,说明系统推荐了这个驱动,即nvidia-driver-535。

安装正确的驱动程序

要安装推荐的驱动程序,请运行以下命令。

$ sudo apt install nvidia-driver-535

另外,您还可以执行以下命令来自动安装推荐版本的驱动程序。此时,机器上会自动安装上述推荐版本的驱动程序。

$ sudo ubuntu-drivers autoinstall

重新启动系统

重新启动计算机以使更改生效。

$ sudo reboot

验证问题是否修复

重启后输入以下命令测试驱动安装。如下图所示,可以看到推荐版本的驱动安装成功。

$ nvidia-smi

nvidia-smi

2024年4月17日星期三

字幕生成新招 如何将 OpenAI Whisper 应用于视频字幕制作

上一篇文章 <<走进 OpenAI Whisper 开源语音识别技术>> 介绍了如何使用 whisper 做音频识别,同时可以生成 音轨文件,本章将介绍如何使用生成的 音轨文件 做视频字幕。

1. 准备

2. 使用 FFmpeg 与 SRT 文件做视频烧录

先看一下 srt 文件内容,可以发现是标准的音轨文件,段、时间与内容

1
00:00:00,000 --> 00:00:03,840
you know, meeting with startups and there's not a startup right now out there that is not applying

2
00:00:03,840 --> 00:00:09,200
these AI generative models, these large language models to every interesting problem of the sun.

使用如下 FFmpeg 命令将原视频与 srt 文件烧录到一起

$ ffmpeg -i 9s.mp4 -vf "subtitles=9s.srt" -c:v libx264 -preset medium -c:a copy output.mp4

最后得到带字幕的视频,如下:

注意,上面的是烧录操作,意味着字幕添加到视频中后,字幕就改不了了,除非重新操作

3. 使用播放器VLC加载VTT文件

视频文件与字幕文件分离,可以随时更改字幕文件。这里不局限于使用 VLC 播放器,大部分播放器都支持加载字幕文件。

如果字幕文件与视频文件在同一目录,且名称一样,后缀不一样,如 9s.mp4 与 9s.vtt,播放器会自动加载字幕,srt 文件也适用。

手动加载字幕的前提是视频与字幕文件名称不一样,或者不在同一位置,此时需要手动加载。

20240426153303

4. 结论

尽管有很多成熟的产品可以实现视频字幕,大部分视频编辑软件可以实现更为强大的能力,这里纯属个人好奇使用,不做他论。

走进 OpenAI Whisper 开源语音识别技术

openai-whisper.webp

OpenAI 在 GitHub 上发布的 Whisper 是一个自动语音识别(ASR)系统。Whisper 是一个端到端的深度学习模型,它对音频片段进行处理,并预测对应的文本输出。

Whisper 个人觉得是目前免费做语音识别最好的系统,使用它的理由:

  1. 免费,开放源代码,意味着可以自由使用,包括商业化。
  2. 在数据训练的大模型基础上,识别任务上变现出色,背景噪音的情况下,也有稳定的表现。
  3. 语言识别模型可自由选择下载,意味着可以离线使用,只要你的机器硬件足够高,识别速度是非常快的。
  4. 多语言能力以及翻译能力,支持多种语言的音频,同时也支持翻译成英文,目前仅支持英文
  5. 可以作为命令行工具使用,也提供相关的 python 接口可供编程的能力

下面介绍安装和基本使用方法

安装

$ pip install git+https://github.com/openai/whisper.git
$ sudo apt update && sudo apt install ffmpeg

这里安装了 whisper 的 python 库,同时也需要安装 ffmpeg,因为 whisper 在处理音频文件时,会用到 ffmpeg 来进行音频解码和转码。

使用

Whisper 安装好后,提供了两种使用方式,即 终端使用 和 编程使用。

这里准备了一个音频素材,从 youtube 下载了一段 bbc 的视频,使用 ffmpeg 做了音频提取得到了一个 9秒的音频片段。

关于如何使用 ffmpeg 提取音频,参考文章 音视频处理工具 FFmpeg 的 TOP 10 常用场景

视频链接 ????
音频链接 ????

编程使用

这里使用 medium 模型,模型大小不到2G,初次使用会下载此模型,下载的路径是 ~/.cache/whisper

import whisper

model = whisper.load_model("medium")
result = model.transcribe("dataset/9s.wav")
print(result["text"])
 You know, meeting with startups and there's not a startup right now out there that is not applying these AI Generative models these large language models to every interesting problem of the sun

这里只是简单输出语音识别后的文字,更多的API,如生成不同格式的文本,见官方文档

终端使用

whisper-help.webp

语音转文本

# 使用 medium 模型识别音频,生成 json、srt、tsv、txt、vtt 文件
whisper --model medium dataset/9s.wav

上面的命令会将识别的音频输出到控制台,同时生成带时间刻度的5个文本文件,当然也可根据自己的需求指定要生成的文件格式。

  • 9s.json json格式的文本
  • 9s.srt 文本文件格式,用于存储视频文件的字幕信息
  • 9s.tsv 用于存储表格数据,类似于 CSV
  • 9s.txt 简单文本
  • 9s.vtt 文本文件格式,用于存储视频文件的字幕信息

语音转文本(翻译)

# 带翻译功能,但目前只能讲目标语言翻译到"英文"
whisper --model medium dataset/9s.wav --task translate

结论

OpenAI Whisper 可以说应该是目前最好的 ASR,基于已训练的模型可以自动识别语音,同时支持翻译能力。如果产品级使用,还需要解决模型加载速度以及RT时长的问题。

Reference

如何使用 Python rich 库让你的终端输出更加丰富多彩

python_rich.webp

Python 的 rich 库是一个用于在终端中创建富文本和美观格式的库。它可以用来打印彩色文本、表格、进度条等,使得命令行界面更加生动和用户友好。

以下是如何安装和使用 rich 库的一些基础示例。

1. 使用 pip 安装

$ pip install rich

确保你的 Python 版本至少是 3.6.1,这是 rich 库所要求的最低版本

2. 基本使用

下面列出基本常规的使用案例,rich 功能不局限于此,更多如渲染 markdowntree 或 输出代码语法高亮等功能,可参考 官方文档

2.1. 打印彩色文本

from rich import print

print("[bold red]Hello[/bold red], [green]World![/green]")

python_rich_color_text.webp

这个功能类似于 shell 中定义颜色文本输出,可参看 Shell技巧#终端使用色彩字体

2.2. 创建表格

酷炫的功能,终端可以使用表格展示数据,实用性很强

from rich.table import Table
from rich.console import Console

console = Console()

table = Table(show_header=True, header_style="bold blue")
table.add_column("Date", style="dim", width=12)
table.add_column("Title")
table.add_column("Production Budget", justify="right")
table.add_column("Box Office", justify="right")

table.add_row("Dec 20, 2019", "Star Wars: The Rise of Skywalker", "$275,000,000", "$375,126,118")
table.add_row("May 25, 2018", "[red]Solo[/red]: A Star Wars Story", "$275,000,000", "$393,151,347")
table.add_row("Dec 15, 2017", "Star Wars Ep. VIII: The Last Jedi", "$262,000,000", "$1,332,539,889")

console.print(table)

python_rich_table.webp

2.3. 进度条示例

from rich.progress import Progress
import time

with Progress() as progress:
    task1 = progress.add_task("[red]Downloading...", total=1000)
    task2 = progress.add_task("[green]Processing...", total=1000)
    task3 = progress.add_task("[cyan]Cooking...", total=1000)

    while not progress.finished:
        progress.update(task1, advance=5)
        progress.update(task2, advance=3)
        progress.update(task3, advance=9)
        time.sleep(0.02)  # 代表实际工作的代码

python_rich_progress.gif

2.4. 使用日志记录

from rich.logging import RichHandler
import logging

# 配置日志记录
logging.basicConfig(
    level="NOTSET",
    format="%(message)s",
    datefmt="[%X]",
    handlers=[RichHandler()]
)

logger = logging.getLogger("rich")

logger.info("这是一条信息日志")
logger.warning("警告!存在潜在问题")
logger.error("这是一条错误日志")

python_rich_log.webp

3. Rich cli

Rich 从 python 库引申了终端的 rich-cli 工具,安装(brew install rich)好可以直接在 shell 终端使用,几个比较使用的功能

$ rich README.md
$ rich data.json
$ rich notebook.ipynb
$ rich loop.py

Reference

Retrieving Secret Values Using REST Services in Infisical

Infisical is the open source secret management platform that developers use to centralize their application configuration and secrets like...